The question of how to change the faucet in the kitchen does not arise as rarely as we would like. For those who think that only a professional plumber can handle this matter, there is good news: it is quite possible to replace the faucet yourself. You just need to stock up on a set of simple tools and materials, get acquainted with the device of the kitchen faucet, and also study the recommendations of specialists.
Necessary tools and materials
Most likely, you will not need any complicated fixtures to replace the faucet in the kitchen. The problem can be solved using:
- adjustable wrench (sometimes it can be successfully replaced with a suitable wrench);
- flat screwdriver;
- Phillips screwdriver;
- flashlight;
- sandpaper.
Tip: If the faucet to be replaced was from inexpensive models, it makes sense to also change the flexible hoses with which it is attached to the water pipes. Expensive models are equipped with better quality hoses, they may still be usable at the time of work. However, there is a risk that the hoses will deteriorate before a new faucet, so in most cases, experts recommend that these parts be completely replaced.
In addition, you should stock up on a small container into which you can drain the water remaining in the siphon. A detergent may also be useful in order to wash off the dirt accumulated under the sink and under the mixer at the same time as replacing the structure. The sealant is used both during the installation of the sink and for threaded connections.
Please note: If the sink is removable, and not mortise, it may have to be removed in order to dismantle the damaged one and install the new faucet in the kitchen more conveniently. In this case, you may also need additional tools, necessary fasteners, sealant, etc.
So, first you need to purchase a new model, as well as prepare all the necessary tools and materials. Then, armed with a flashlight, you need to look under the sink and get acquainted with the place of work. The whole process can be divided into two stages: dismantling the old mixer and installing a new one.
How to dismantle a broken model?
The dismantling of a damaged faucet does not begin in the kitchen, but in the bathroom. First you need to turn off the water so that the kitchen is not flooded.
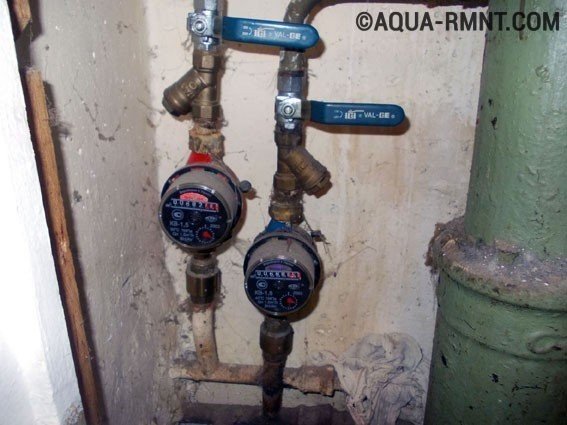
Before dismantling the mixer, you must turn off the water supply. The handles on the faucets must be in a position perpendicular to the water pipe
After that, you can proceed directly to the removal of the damaged mixer. For this you need:
1. Open the water tap to drain the remaining water in the system.
2. Find the connection between the flexible hoses of the mixer and the water pipes.
3. Find the place where the faucet is attached to the sink.
4. If the sink is overhead, it should be carefully dismantled.
5. Disconnect the flexible hose from the water pipe using an adjustable wrench. At this stage, you can use a small container or jar to drain the water left in the pipes.
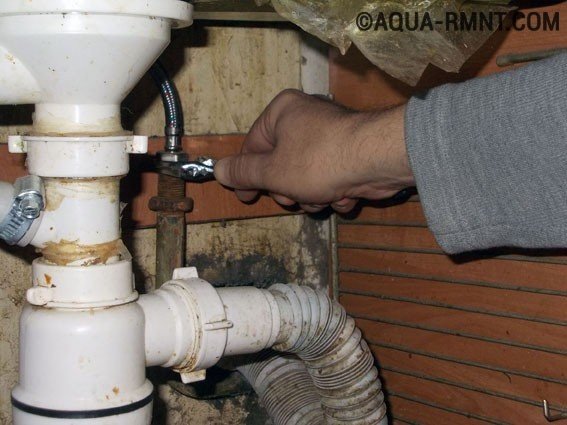
Disconnect the flexible hoses from the water pipe using an adjustable wrench. Be careful not to damage the connection
6. Disconnect the lower part of the siphon.
7. The sink can now be removed.
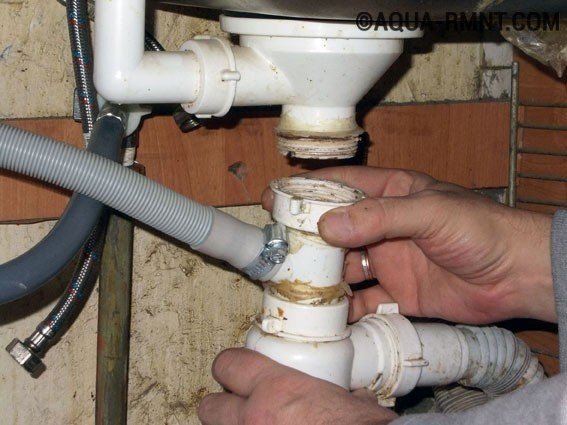
After the lower part of the siphon is disconnected, the sink must be very carefully turned over and installed in a position convenient for further work.
8. Turn the sink around so that you have access to the faucet holder.
9. Using an adjustable wrench, loosen the nut that is on the threaded pin.
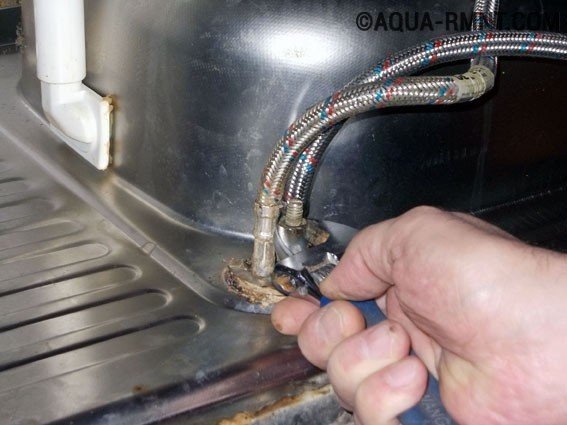
Before you start unscrewing the threaded pins, you must use an adjustable wrench and loosen the fixing nut on the mixer
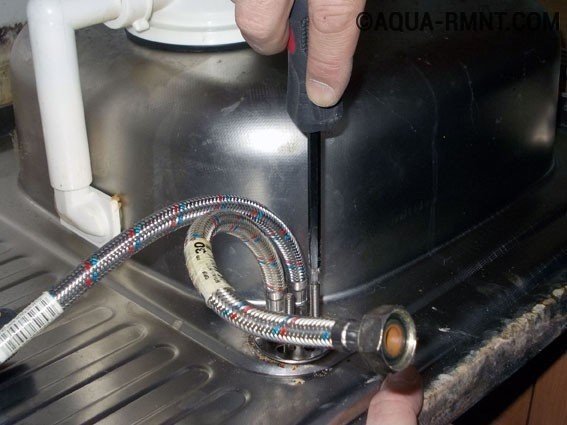
10. Now, using a flat or Phillips screwdriver, you need to unscrew the threaded pin itself. To prevent the mixer from falling, it should be held from below with your hand.
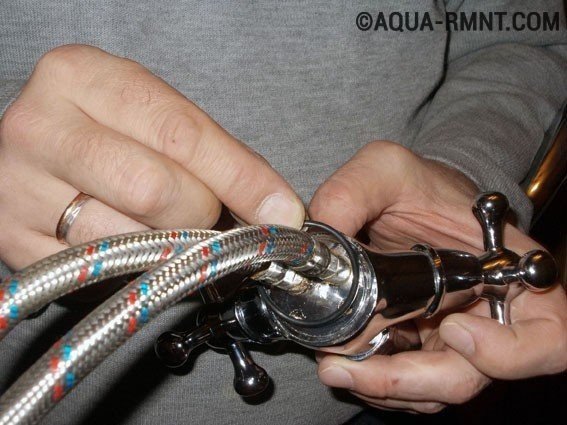
11. Remove the clip and then take out the faucet to which the old flexible hoses are attached.

After all fasteners are removed, you need to carefully remove the mixer. Flexible hoses should be carefully passed through the mounting hole
Please note: if it is decided to leave the old flexible hoses, they must be disconnected from the damaged mixer at this stage (an adjustable wrench will come in handy again). Then the hoses are attached to the new mixer, after which the installation continues. In this case, you need to check the condition of the gaskets of each hose. They must be intact, without signs of deformation and located in the place intended for them.
After the old device is dismantled, you can proceed with the installation of a new mixer. However, before that, it does not hurt to inspect the mounting hole and remove accumulated dirt from there, if any.
Installing a new mixer
Before installing the mixer, it is necessary, of course, to assemble and connect the elements of the supply to the water pipes, i.e. flexible hoses.
After that, you can install a new mixer directly on the sink:
1. First of all, you need to put an annular gasket on the base of the mixer. It must be exactly in the groove intended for it. If violations are made at this stage, water will flow under the sink and may damage the cabinet, as well as the elements located under the sink.
The O-ring must be placed exactly in its intended recess. If this is not done, it is almost impossible to avoid leaks.
2. Now you need to pass the flexible hoses through the mounting hole for the faucet (the removed sink is still upside down). The mixer must again be held from below with a free hand. It is necessary to ensure that the ring gasket does not move at this moment.
3. Install a rubber seal, the shape of which must match the configuration of the pressure plate.

First install the rubber seal, and then the pressure plate, the configuration of which is the same. The mixer must be supported so that it does not fall.
4. Place the pressure plate on top of the seal.
5. Screw the threaded pins into the structure through the appropriate holes.
Tip: Depending on the device, the mixer may be equipped with one or two threaded pins. It is important to ensure that the slots for the screwdriver remain outside and not in the inside of the mixer, since this device will also have to be dismantled one day. Usually on new faucets, the threaded pins are screwed in very easily, just with your fingers. You can use a screwdriver, but experts do not recommend tightening them too tightly.
Threaded pins screw in freely. They can be tightened with a screwdriver, but not too tight. After that, carefully tighten the nut with an adjustable wrench.
6. Now, using an adjustable wrench, you need to tighten the mounting nuts. Here, additional efforts will be needed, since if the nuts are poorly tightened, the mixer will “walk”, rotate around its axis.
Thus, the problem of how to put a new faucet in the kitchen instead of the old one can be considered successfully solved. It remains only to install the dismantled sink in the place intended for it. Before that, it makes sense to clean up: clean the places where the sink is attached to the wall, the wall itself, the inside of the cabinet, etc. After that, the sink is put in place, the flexible hoses of the mixer are connected to the water pipe, and the top of the siphon to the bottom.
The final stage is to check the operation of the new equipment. To do this, let the water into the system again, returning the valves to their previous position, open a new mixer and inspect all the connections. If the previous steps are done correctly, no leaks will be found. A brand new faucet will last for many years to come.