A modern light source that is a great alternative to traditional lighting. It is beautiful, original, aesthetically pleasing and profitable. Learn more about how to create lighting with LED strip - read our article!
Often, an LED strip is used as an addition to the main lighting, but it is turned on much more often than, for example, a chandelier. So why not use it alone, without additional light sources? After all, this is logical: the space of the ceiling and walls is not cluttered with lighting fixtures, and the light source becomes unobtrusive and elegant. In addition, such lighting looks very modern. But let's just say it's not cheap. Investments can be up to 15 - 20 thousand rubles, which is several times more expensive than the cost of a conventional chandelier and the use of incandescent bulbs. However, the installation of the LED strip is not done for one year, and a considerable amount will pay for itself in the future. Do you doubt? Let's give some arguments.
About the benefits of LED lighting
- Firstly, this is a great solution for rooms with low ceilings, where a chandelier or lamp fills part of the space anyway. Moreover, the LED strip fits perfectly into the interior in a minimalist or high-tech style.
- Secondly, the product consumes little power. Let's take an example. The power consumption of 1 m of tape is from 4.8 to 9.6 W, while for incandescent lamps this parameter reaches 60 - 100 W, for halogen lamps - 25 - 75 W, for fluorescent lamps - 20 - 30 W.
- Third saves on lamp replacement. If an incandescent lamp is replaced at least once a year (and there is more than one in a chandelier), then the LEDs can work up to 100,000 hours. If you turn on the lighting for about 5 hours a day, then the LED elements will not have to be replaced for as long as 50 years, otherwise and longer!
So, you have decided that the LED strip is suitable for the main lighting and want to do the installation yourself? To spend money not in vain, we recommend that you familiarize yourself with the work process. Then you do not have to redo anything, and you will be satisfied with the result. Let's start with the main thing - with the purchase.
What will you need?

LED Strip Light selected according to the characteristics of a particular room. If it is a kitchen or living room, choose a product with white cold glow. Much more suitable for the bedroom and recreation area warm light, since it does not irritate the eyes and is as close as possible to the usual glow of an incandescent lamp. Bright, colored LEDs in this situation should not be considered, since they are intended for accent and decorative lighting, which does not turn on all the time, but from time to time. The color temperature of the LED strip should be close to this value of incandescent lamps. That is, 3000 - 4000 K will be as comfortable as possible for a person. LEDs of the SMD 5630 and type are excellent as the main light source, since they have the largest LED elements. Pay attention to the type of glow: it can be frontal or lateral . If you will mount the tape on the ceiling, preference is given to the first type, when mounting on the wall - to the second. Knowing the perimeter of the room in advance, you can calculate length ribbons. If you are going to additionally mount elements, for example, in a niche or in the middle of the ceiling, you should buy material with a margin. Products are sold wound on reels - most often you can find windings of 3 - 5 m.

Power supplies designed to connect the tape to the mains. This is necessary to lower the input voltage from 220 V to the operating voltage of the LED strip - 12 or 24 V. In addition, the device serves for protection against short circuit, overload and overheating. High-quality power supplies must withstand and voltage drops in the power grid. For example, the model operates with fluctuations in the range from 100 to 260 watts. It is important to choose the right block by power . Usually proceed from the total power consumption of all tapes that are used indoors. For example, for 15 m of tape length, the power consumption is 240 watts. To prevent a voltage drop along the length, it is recommended to buy a power supply with a small margin, or better, two blocks to share the load. Thus, two 150 W power supplies are connected with a 15 m tape.

For mounting LED strip needed profile. Pay attention to its width - it must fit the width of the tape, otherwise you will hardly be able to fit it there. The length of the profile is selected according to the length of the tape, i.e. under the perimeter of the room, plus the length of additional illuminated elements, if any. To connect the tape segments, you will need, the width of which must also correspond to the width of the products.
For driving lighting, you can install a switch, dimmer or controller with remote control.
For work you need the following tools: drill, screwdriver, hacksaw, tape measure, miter box, scissors, self-tapping screws from consumables.
Decide how the lighting will be organized. You can fasten the tape around the perimeter of the ceiling or put a few in the middle - along or across. You can combine different options to achieve an original effect. Particularly interesting is the illumination on a multi-level ceiling. Mark the lines along which the profile will be attached. Get perfectly straight lines will help.
Important! LED strip lighting has a positive effect only when mounted on a flat surface, such as a perfectly smooth false ceiling or aligned walls. If the base is uneven, the glow line is distorted - it does not look very aesthetically pleasing.
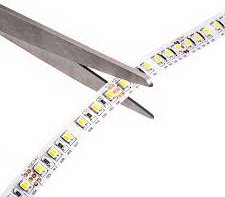
A profile is attached along the drawn lines. To begin with, holes are drilled in the profile itself, for example, at intervals of 0.5 - 1 m. Holes are drilled in appropriate places in brick or concrete walls and dowels are inserted there. If the profile is attached to drywall, you can skip this step and screw the screws directly into the material through the holes made in the profile. Note that when cutting a profile, elements intended for fastening in corners must be joined at an angle of 45 °. Use a miter box for precise sawing. The tape fits into the profile along the entire length. Its segments are connected by connectors. To cut the tape, take ordinary scissors and make a cut between the LEDs.
Important! If the tape is mounted on a wall, it is necessary to make a small indent from the ceiling - about 5 cm. In this case, the reflection of light from it will be better. But if this is not possible due to any features of the interior, you can mount the profile close to the ceiling.
After the profile is fixed on the wall and the LED strip is laid in it, the contacts are connected to the power wires going to the unit. Connect to a switch or dimmer. The profile is closed with a diffuser - a special transparent cover that comes with it. You can test - turn on the lights!
![]()
When properly connected, the light should appear without bright flashes and flickers, the room is illuminated evenly. According to users who use LED strip as the main lighting, 15 m of strip is enough to replace two 100 W incandescent lamps. In addition, a distributed light source is obtained, covering the entire room. Whereas the lamp is a point source, and in areas far from the center there may not be enough light and shadows form. The LED strip illuminates the entire perimeter and center of the room - almost the same light everywhere! In addition, LEDs give a brighter light, in which the colors in the interior are perceived in a new way. Want to see it for yourself? Installing such a backlight in your home is very simple!
In our online store you can buy in the required quantities and order everything you need for its installation. If you need help in choosing, please contact the manager for advice. Just call the number listed on the site. You will receive the goods as soon as possible with delivery to your home or to the nearest pickup point and you will be able to proceed with the installation.