The article is intended to show all the pitfalls and costs in the use of LED strip as the main lighting.
Initially, an ordinary chandelier was planned for the main lighting of one of the rooms where a major overhaul was underway. But recently, I came across a super-bright Ultra 5000 LED strip with smd 5630 LEDs from the Arlight brand. The decision was made quickly, finally and irrevocably - I want such a tape as the main light in the room.
Theoretical brightness
The manufacturer claims that the Ultra 5000 smd 5630 tape provides a luminous flux of as much as 1200 lm per meter. For comparison, the luminous flux of a 100-watt incandescent lamp is about 1600 lm.
In my case, 15 meters of tape laid around the entire perimeter had to be used for a room of 14 m 2. The resulting luminous flux, it seems, cannot be calculated by simply multiplying lumens by meters.
I decided to wonder how to correctly calculate the total luminous flux, but, after googling, I realized that this task cannot be solved with a swoop. I need to spend n-th time studying the theory of lighting calculations using the luminous flux utilization factor method and somewhere to find some data unknown to me:
- reflectivity of walls, ceiling, other objects;
- honest luminous flux of one LED tape;
- characteristics of the profile diffuser in which it was planned to place the tape;
- voltage drop along the tape and the dependence of the LED luminous flux on it.
In the end, I decided that I would just do it and see what happens. But, just in case, I also bought a dimmer for LED strips. Suddenly it will be too bright ????
Theoretical spectrum
Bright LEDs are, of course, cool. But, one thing is brightness, and another is the spectrum of light.
If again compared with an incandescent lamp, it is good because it emits light in a wide range, its spectrum is relatively uniform and in some part close to the spectrum of sunlight. Such light is familiar and pleasing to the eye, it does not irritate or tire.
The spectrum of white LEDs is significantly different from the spectrum of an incandescent lamp, and not for the better:
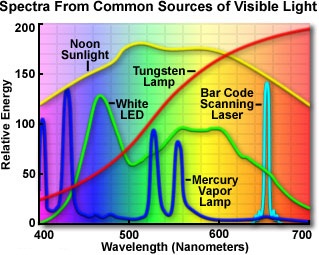
White LEDs in this case are of the phosphor type, two humps on the spectral characteristic are formed from the emission of a blue LED (blue region of the spectrum) and a phosphor (yellow region of the spectrum).
In my lower brain, I knew that I should be careful with the use of LED lighting and leave the usual chandelier as well. Who knows how the eyes will react to such a spectrum. It is also hardly possible to calculate this in advance.
By color temperature, I chose the tape middle of the three options offered by the manufacturer - the so-called. Day White, 4000 K. Just seemed the most pleasant.
Accessories
Profile
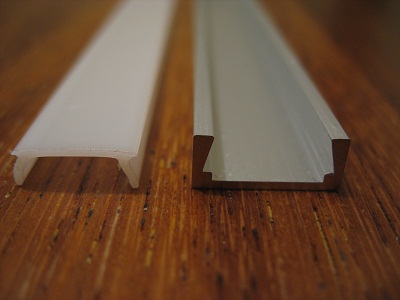
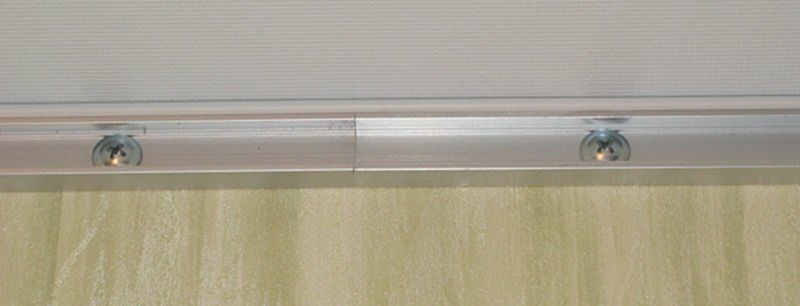
I have a simple stretch fabric ceiling, without any multilevels and cornices, and since it was planned to place the lighting perimeter tape under the ceiling in plain sight, it was necessary to ennoble its appearance, but make it as inconspicuous as possible. Wondering which profile to use, straight or angled? It turned out that the intensity and uniformity of illumination did not visually change from the direction of the glow of the LEDs of the tape located near the ceiling. What is down, along the wall, what is along the ceiling, what is at an angle to them - the same. This is understandable, the passport glow angle of these LEDs is 120 °, but in reality it turned out to be close to 180. Therefore, the angle of the tape was not important, and I chose a straight profile as the most compact:
Ribbon
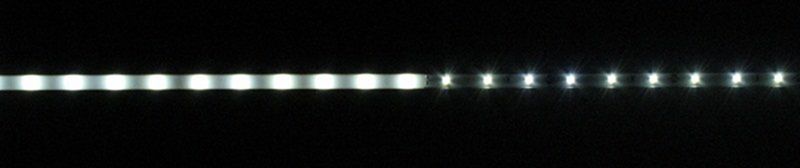
Tape Ultra 5000 is supplied from the factory on spools of 5 meters, the tape cutting ratio is 10 cm, the store cuts for sale in multiples of a meter. In my case, I didn’t have to cut, I took three whole packages:

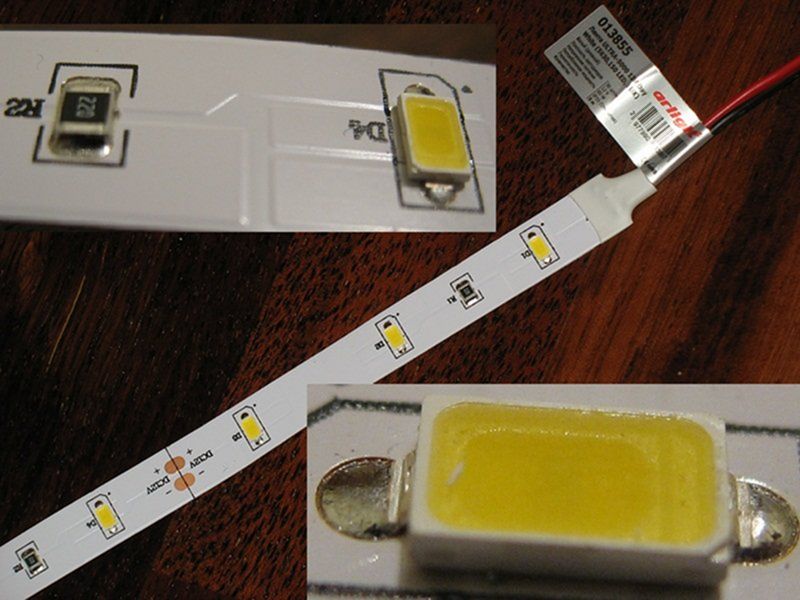
The width of the tape is 12 mm, it does not fit into the selected profile quite regularly, but it fits:
Power supplies
Passport power consumption of 15 meters of tape - 240 watts. Calculated by real measurement - 180 W (measured on a 3-meter segment, the current consumption was 3 A).
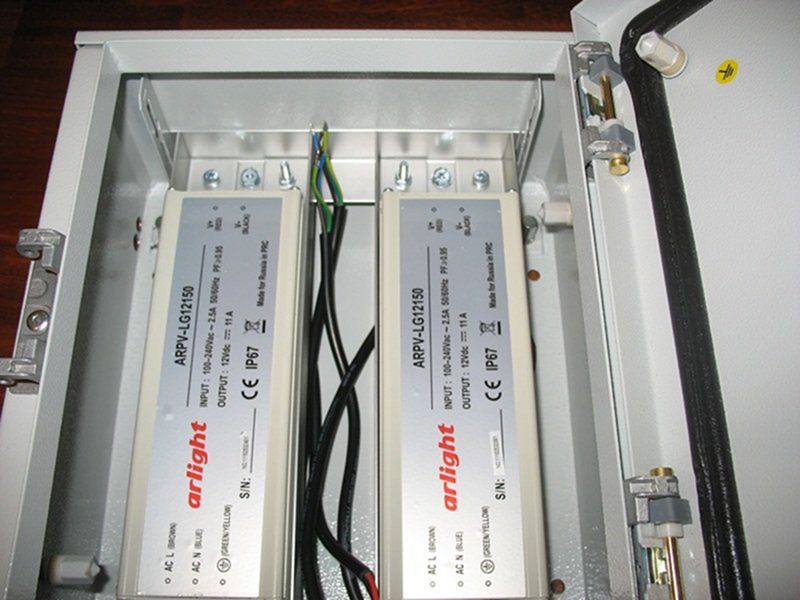
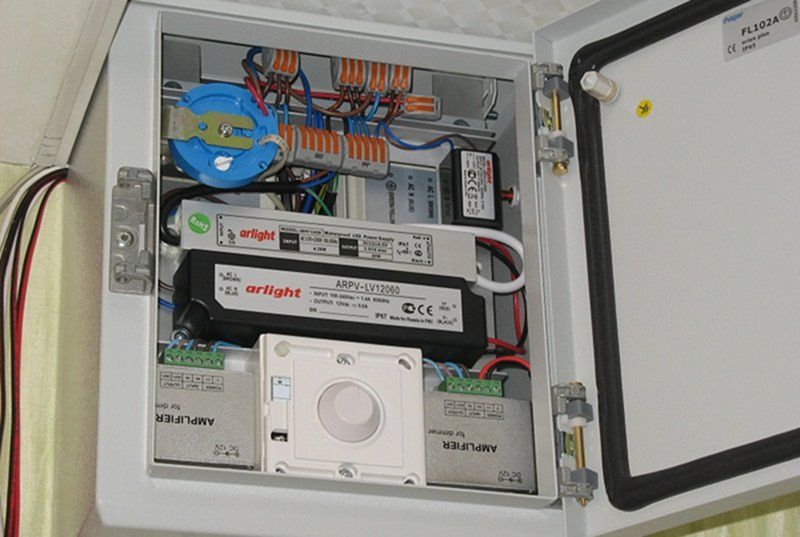
But, in addition to power consumption, there is also a factor of voltage drop along the tape, which leads to a gradual decrease in the brightness of the glow towards its end. Power supplies for LED strips (all or not - I don’t know, but those that I took - yes) allow you to power one common load in parallel. To equalize the brightness along long powerful tapes, instead of one power supply at one end, two less powerful power supplies are turned on at both ends of the tape, and in especially difficult cases, also in the middle of the tape. In my case, the perimeter is closed, I divided it in half, and simply took two 130 W power supplies and connected 7.5 meters of tape to each separately:
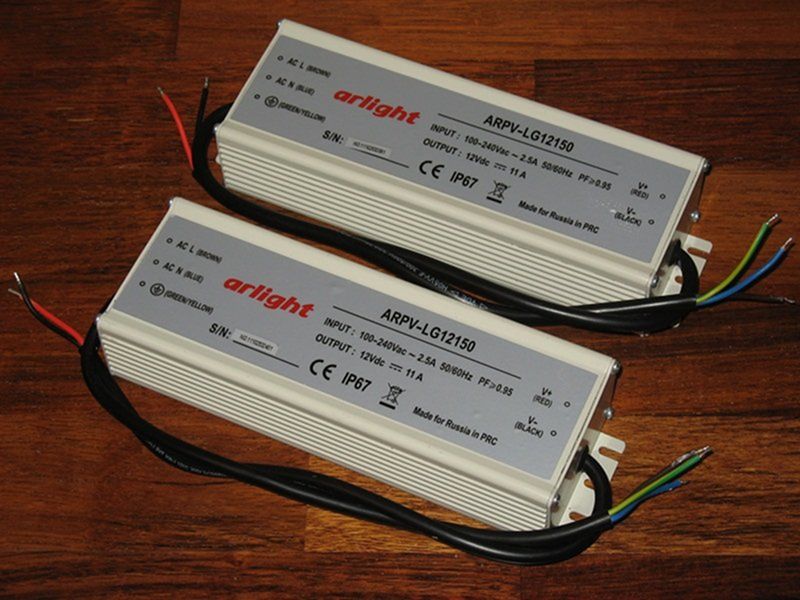
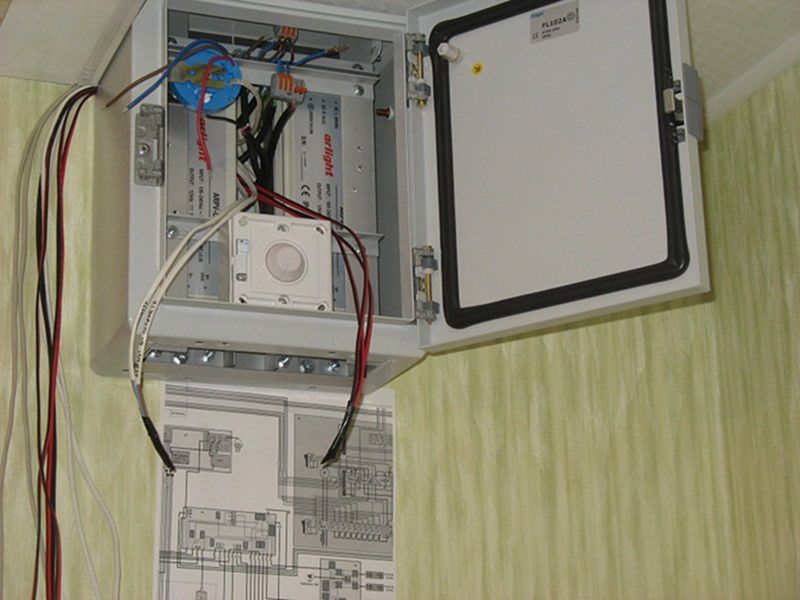
The choice of sealed power supplies was due to the fact that they have significantly smaller dimensions compared to open ones and do not have coolers, that is, they do not make noise, which is important. In addition, I planned to place them all in a sealed (for fire safety) shield, located in a hidden place inside the closet, where there are problems with heat dissipation.
Dimmer
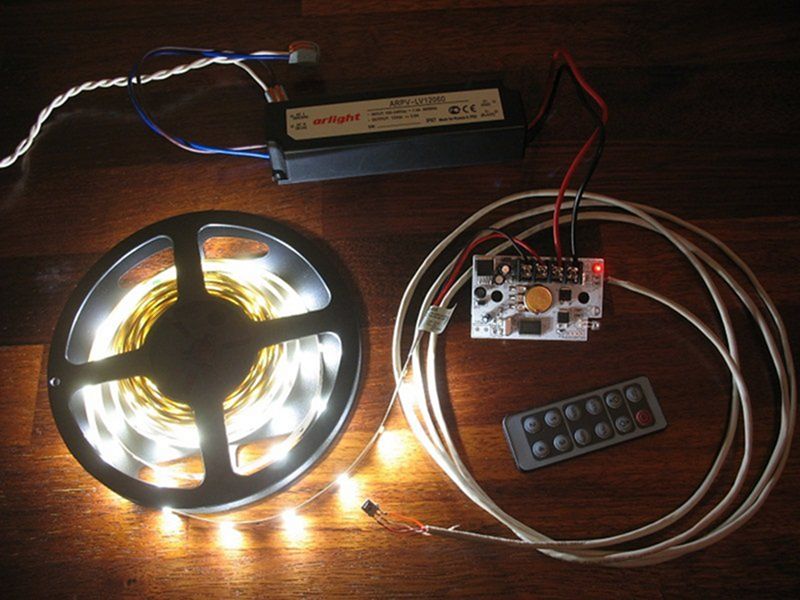
The dimmer that I liked the most in terms of functionality from those that were available was originally designed for wall installation:

This dimmer has both mechanical brightness control and remote control. Moreover, in addition to smooth adjustment, the remote control has four buttons for preset brightness levels (25%, 50% 75% and 100%), and four more buttons for programming user levels.
But for connection, it requires four wires, which I did not have in the walls. So I made the decision that Dimmer I will install in the shield along with power supplies. By mechanically adjusting the brightness level, I will only set the starting level when the tape is turned on, and I will adjust the desired brightness with remote control.
But this will require soldering IR receiver:
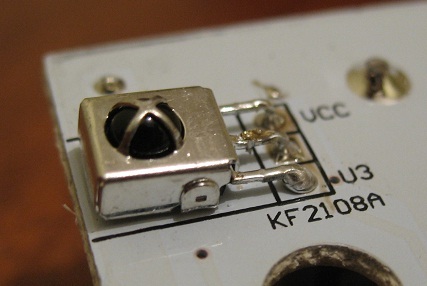
take it out on the wire from the shield and place it in a convenient, inconspicuous place. Will it work like this? Checked it works:
Looking ahead, I note that the dimmer has one significant drawback.
The role of the memory of the brightness level set before turning off is performed by a potentiometer. When 12 volts is applied to the dimmer, the tape turns on at the brightness level that was set by the potentiometer. After that, the brightness can be changed both from the remote control and the potentiometer. But, regardless of how the potentiometer was installed, in the first moment when turned on, the dimmer does not immediately start the PWM, and a clean 12 volts comes out. At the moment of switching on, the tape necessarily flashes for a fraction of a second at maximum brightness, and then it is set to the specified one. It hurts badly in the eyes.
Amplifiers
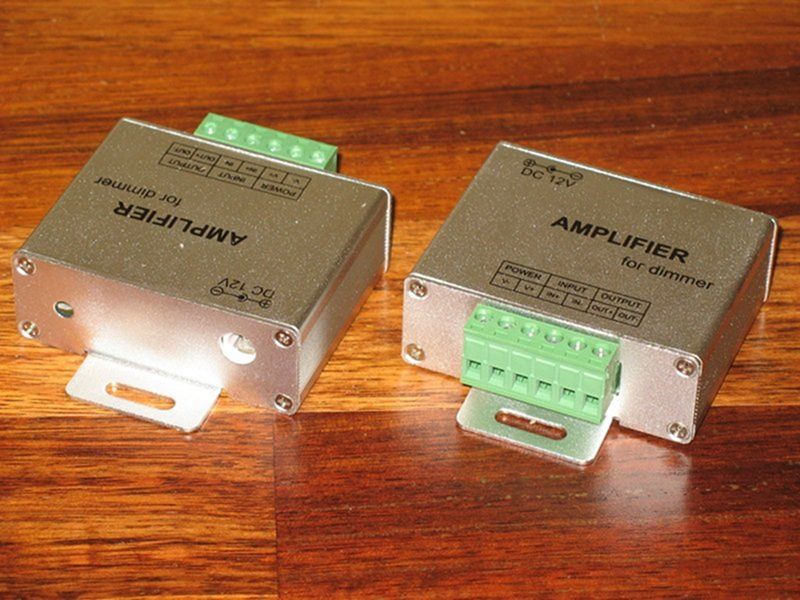
The dimmer power was not enough for my tapes. I had to buy extra amplifiers- one for each power supply:
Shield mounting
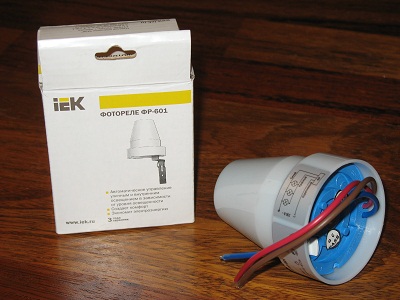
In addition to the main lighting, I decided to use another 3 meters of the same tape for local lighting above the cabinet, with a separate wall switch and limit switches in the sliding doors. And I also planned decorative lighting from a simple LED strip and a night light on duty on a short segment of a dim tape with switching on from a photo relay. All this is not directly related to this article, but since it was necessary to place an additional three different power supplies in the shield, this should be mentioned. Initially, the photorelay has a rather large size and an unaesthetic appearance, so I also wanted to hide it in a shield so that it does not loom before our eyes:
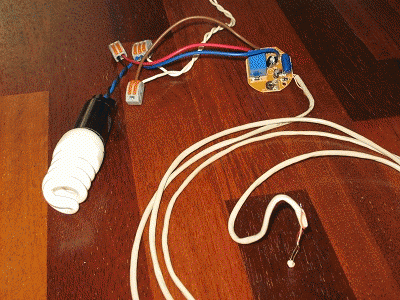
I did the same with him dimmer- soldered the sensor and brought it out on the wire, after checking that this would also work:
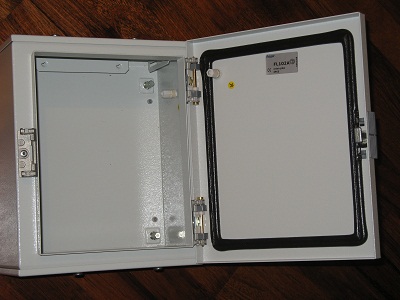
I found a sealed shield of suitable sizes:
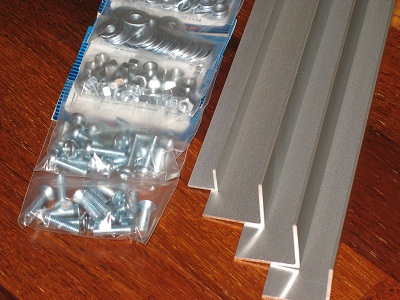
Zatar corners and fasteners:
And proceeded to install:
The shield is ready:
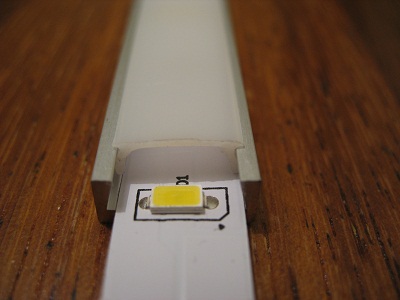
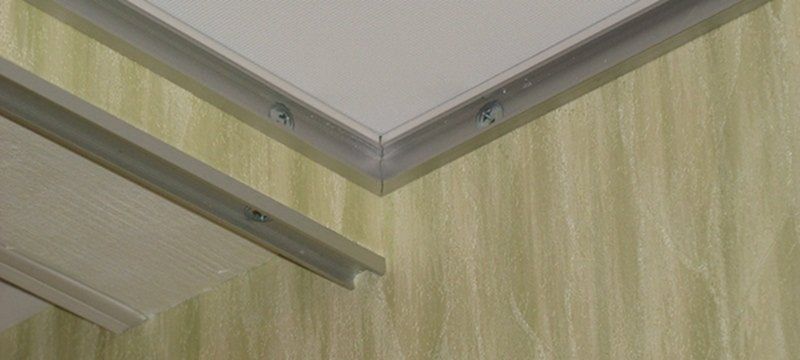
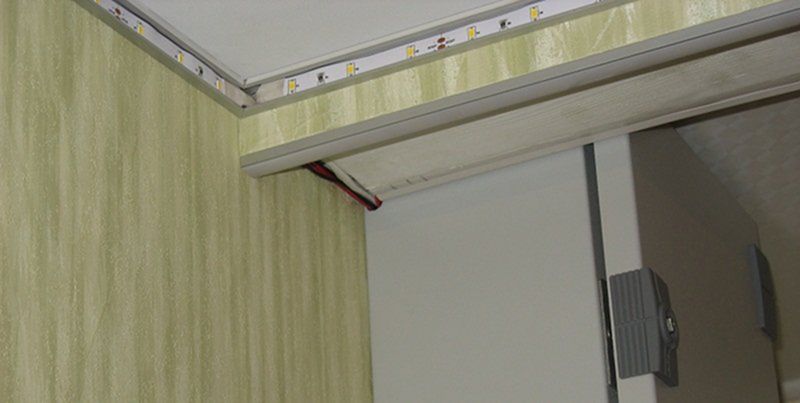
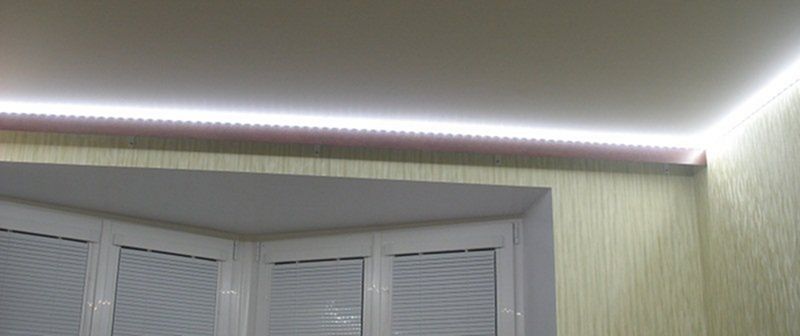
Mounting profile and tape
To increase the light output, it would be desirable to mount the tape not close to the ceiling, but a little lower, at least 5 centimeters. In this case, the reflection of the light from the tape from the ceiling will be better. But I didn’t have such an opportunity for some subjective reasons, so I mounted it close to the ceiling.
On the left is a piece of profile for the local lighting tape above the cabinet, mounted on the lower end of the cornice, behind which the decorative lighting tape will be located:
It is easy to cut a profile with a hacksaw for metal with a fine tooth exactly at an angle of 45 ° if you use a miter box, for example:
The profile was fastened with gypsum-tapping screws 32 long directly into the drywall, without dowels (the drywall is glued to the walls on Perlfix), having previously drilled holes in it (in the profile) with a step of half a meter:
Then he laid the tape in a profile, soldered the power wires. The perimeter profile has not yet been closed with a diffuser (the store has not yet delivered part of the diffuser), only the local lighting profile above the cabinet has been closed:
First power on
So - let's turn it on!
Wow! It's awesome!
Of course, I'm not blind from the brightness. Bright, yes, but not overwhelming. And very beautiful!
Flash photo:
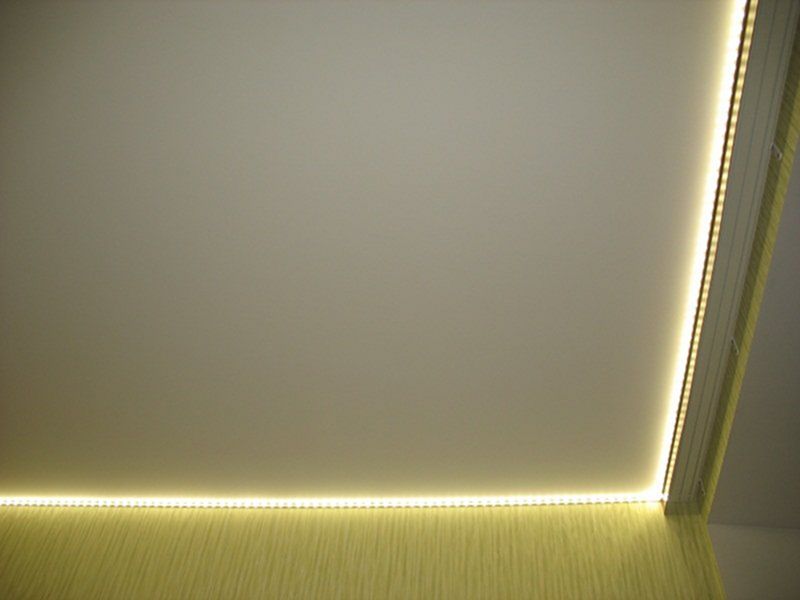
Without Flash:
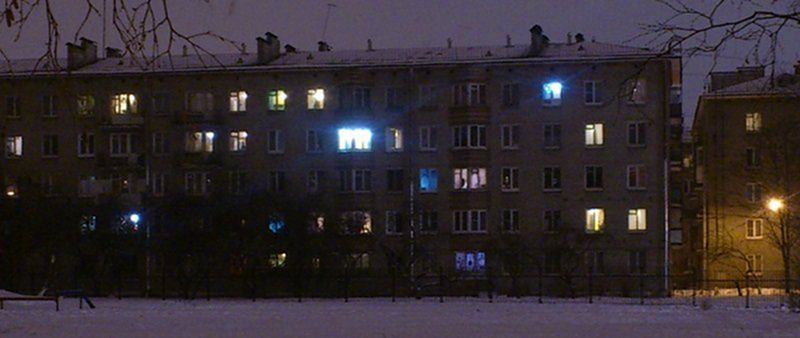
View from the street (4th floor):
I tried to photograph the difference in illumination between the tape and the 200 W incandescent lamp, which I still hang instead of a chandelier. I fixed the camera settings with one light source, launched the camera for a series of shots, and in the meantime switched the light source. Here's what happened.
First, I tuned in to the light of an incandescent lamp and launched a series, the first photo is a lamp, the second is a tape:
Now, on the contrary, the first is a tape, the second is a lamp:
An interesting effect - under the light of the tape, there are almost no vertical shadows. This can be seen, for example, by the shadow from the horizontal pipe and the missing shadow from the vertically located regulator knob on it.
These pictures show that 15 meters of tape shines brighter than a 200 W incandescent lamp. But it seems like not much. In fact, the comparison is certainly not entirely correct. The light bulb is a point source, and the tape is a distributed one. Under the light of a lamp, the corners of the room are much darker than in the center, and under the light of a tape located around the perimeter, it is equally light everywhere.
I measured the illumination with a luxmeter:
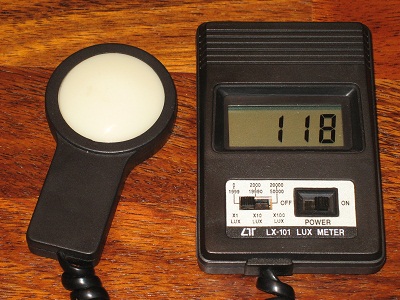
Here are the results in numbers:
As can be seen from the table, the illumination under the light of the tape differs slightly between different measurement points in the room, near the floor, at eye level, in the corners or in the center - the difference is no more than 2-3 times. Of course, this is a consequence of the uniform distribution of a large number of point light sources along the perimeter of the room. What is not observed in a light bulb that hangs in the center of the ceiling - the difference at different points reaches almost 30 times.
When turned on at the same time, both the lamps and the tapes of their illumination simply summed up.
If someone explains to me on the fingers why the lumens do not add up directly (or add up?), And the lux add up (maybe this is a consequence of the large difference in the spectral characteristics of the LED and the lamp in the long-wave region?), And how with a declared light intensity of 1200 lumens per meter when measured at a distance of 1 meter from a piece of tape 4 meters long, the illumination is only 530 lux, I will be very grateful.
On a small segment, I put a diffuser on the profile, took a picture of the difference at a short shutter speed:
I measured the illumination at a certain distance: without a diffuser 600 lx, with a diffuser 520 lx at the same distance. Absorbs more than 10%. It is a pity that there is no diffuser for the entire perimeter yet, so as not to assess the overall decrease in illumination.
Voltage drop
The voltage along the tape drops significantly.
At the beginning, it was 11.5 V, and at the end of a segment of 7.5 meters it was already 8.5 V. Total - 0.4 Volts per meter.
The drop in brightness is not striking, but if you specifically compare it, you can see that in one corner the tape is much brighter than in the other.
Measurements with a luxmeter at a distance of about 30 cm in opposite corners of the perimeter gave results of 1600 and 600 lux, a difference of more than 2.5 times. Measurements at other distances gave the same difference of 2.5-3 times. Therefore, the value of 530 lux in the table for measurements at a distance of 1 meter from the tape is a certain average value, measured at a distance of about 2 meters from the beginning of the tape.
Tape heating, shield temperature
The tape heats up, and heats up noticeably.
At the beginning of the tape, the temperature of the aluminum profile was 55 ... 57°C, but at the end it was already quite cool, about 30°C. When the diffuser is installed on the profile, the temperature does not differ significantly.
Inside the sealed shield at maximum load (which is unlikely to happen in reality), the temperature also did not rise above 57 ° C after a 4-hour run. This is slightly higher than the passport operating temperature of the power supplies, but it didn’t stink, everything worked. In normal operating mode, when only the perimeter tape is turned on, the temperature in the shield was set exactly at the level of the power supply rating of 45 ° C. Quite satisfactory.
Summary
I am quite satisfied with the technical side of the LED lighting system. Convenient and easy installation, high-quality components, turning on the light without delay (which is not provided by all power supplies for LED strips), silent operation, moderate heating, low consumption with high light output. There are only two minuses, but both are in principle solvable - the voltage drop along the tape (although the total illumination in the room is already quite enough), and the incorrect operation of the dimmer at the time of switching on (you can solve it by introducing a delay circuit for turning on the tape after turning on the dimmer, but then instead of flashing it will be this is the delay, I don’t know which is better).
It's too early to talk about the operational side, it takes time.
The first impression is that this light is completely different. And you can't say it's better or worse. Just different.
For several days I was engaged in assembling furniture while lighting the tape, I did not feel any discomfort. In general, so far I like everything.
I did not like the financial side - the whole system cost me about 20 thousand rubles. The cost of a meter of tape in the profile is approximately 1 thousand rubles. Plus power supplies and other equipment. It's not known exactly how long this will last. For LEDs, a service life of about 100 thousand hours is declared, by which time they lose up to 30% of brightness. If you use the tape an average of 5 hours a day, then it should last for 50 years. We'll see.